User guide
Every step below uses the real dashboard. Screenshots are taken from a live account, so what you see is what you will get.
0Before you start
Create an account
Sign up, then top up your USD wallet by PayPal or card (QR bank transfer in Vietnam). Funds are credited instantly.
Create a project and an app
In the dashboard press + Create project, then + New app. Name the app (lowercase letters, digits, hyphens), pick a plan and press create.
1Deploy with git push
Send your code and the platform detects a Dockerfile or your language (Node.js, Python, Ruby, Go, PHP…), builds it and starts the container with live logs. You can also upload a ZIP or connect GitHub/GitLab.
Create a Git access token
Open Git access tokens in the left menu and create a token. It is shown once: copy it. You will use it as the password for git.
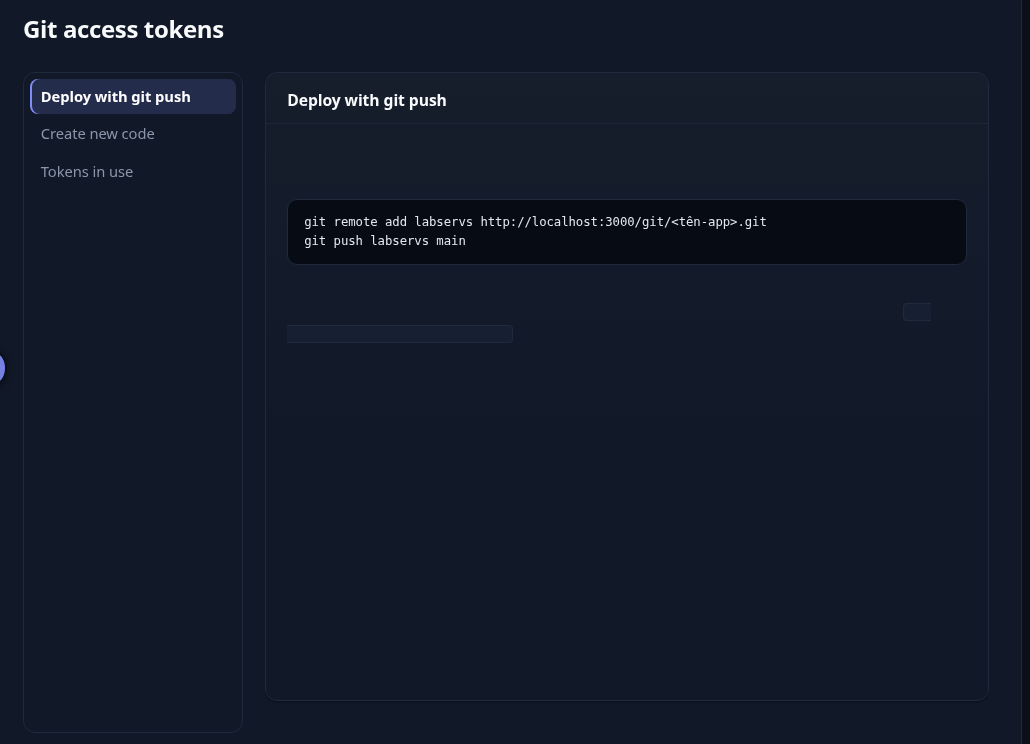
Git access tokens page Add the remote and push
In your project folder run the two commands below. Use any username and the token as the password when git asks.
git remote add labservs https://labservs.com/git/shop-web.git
git push labservs main
Or upload a ZIP
Open the app, tab Source code › Upload source code. Drag a ZIP of your project (up to 50 MB) and it is deployed. Every method goes into the same git repository of the app.
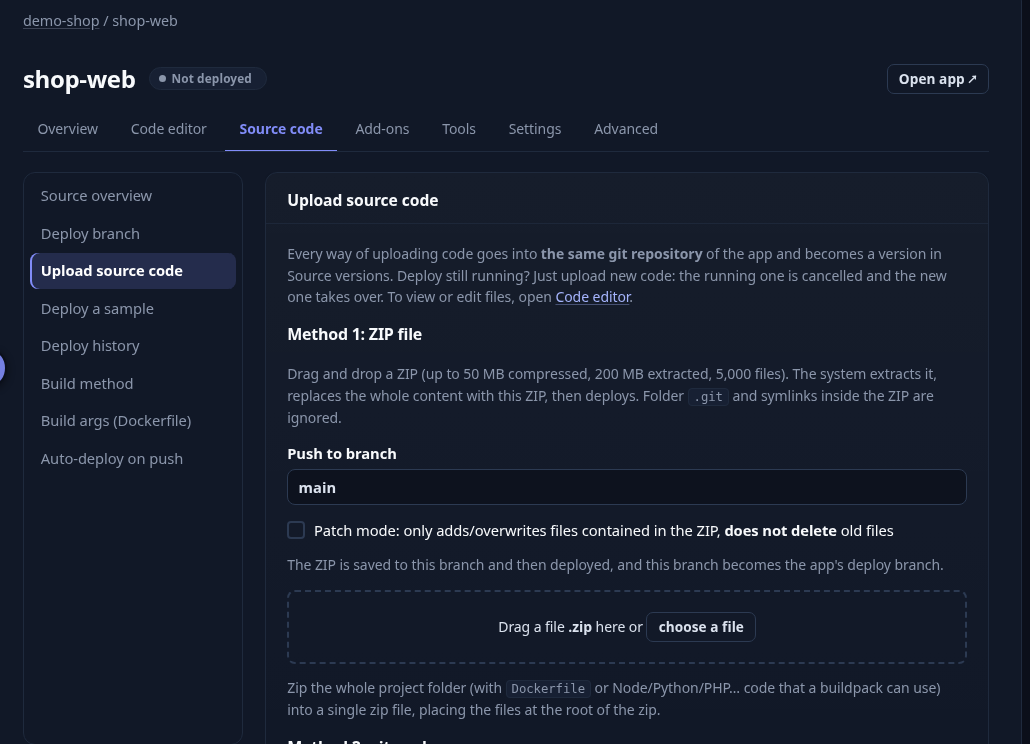
Upload source code panel with the ZIP drop area Turn on auto-deploy
In Source code › Auto-deploy on push connect GitHub or GitLab so each push to your branch deploys automatically (a preview environment per branch is available).
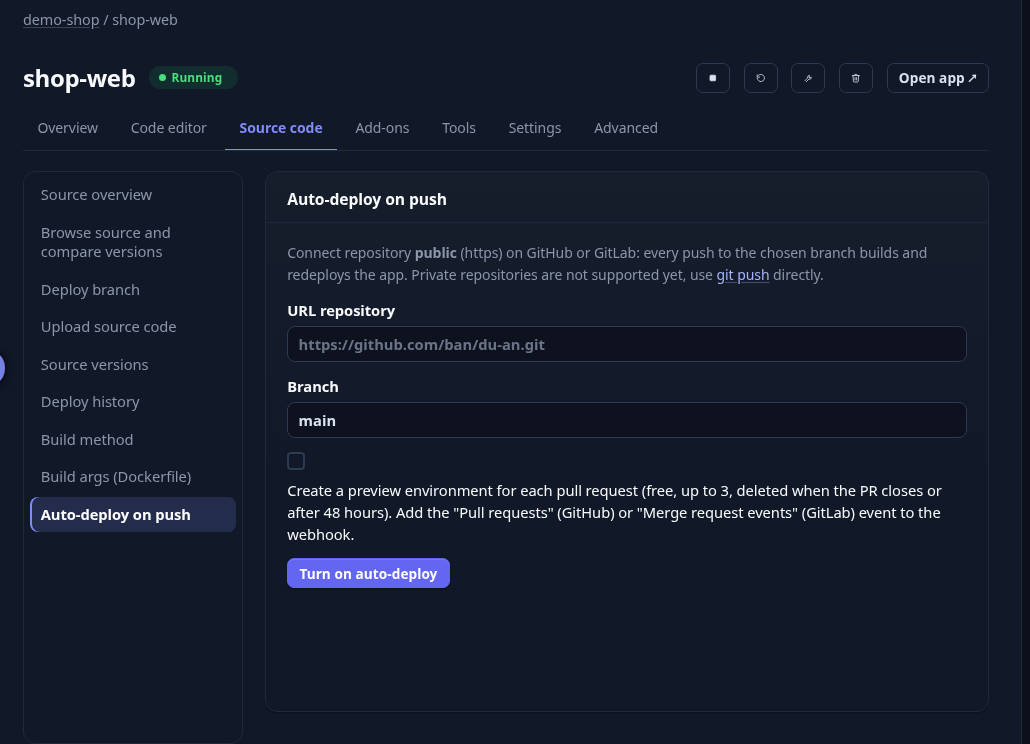
Auto-deploy on push panel Watch the build
The build log streams live. When the badge shows Succeeded and the log ends with Application deployed, press Open app. If it fails, ask the AI assistant: it reads your latest deploy log.
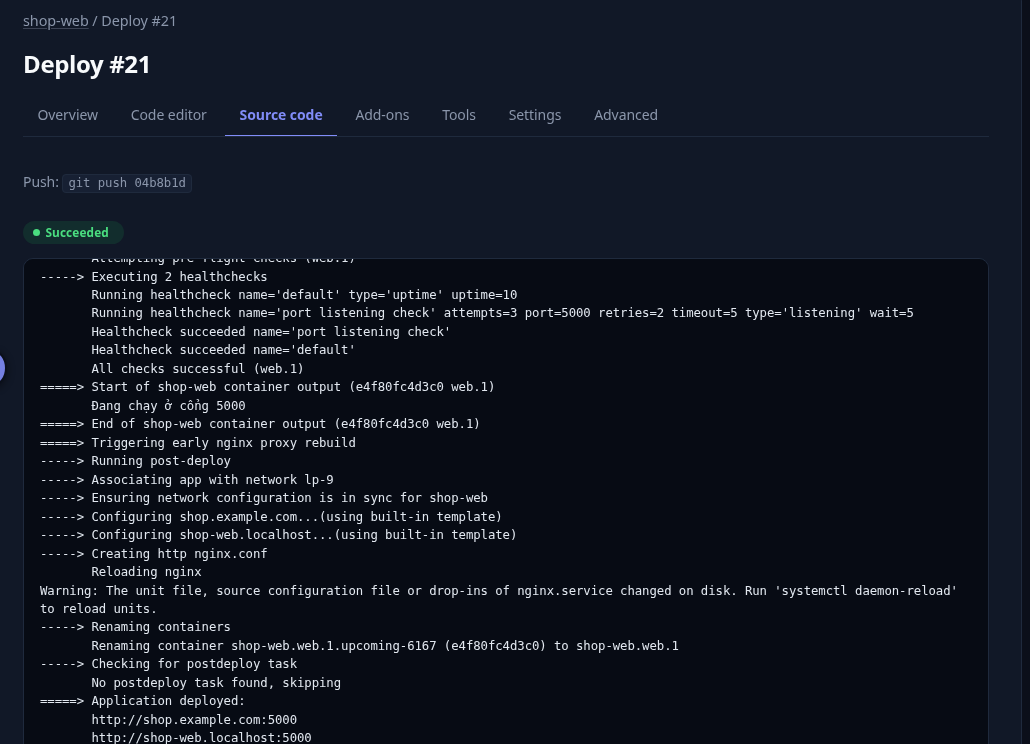
Deploy log with the Succeeded badge and the final Application deployed lines
Tip: No Dockerfile? Node.js, Python, Ruby, Go and PHP apps are detected automatically. Prefer your own image? Use Deploy image in the same tab.
2One-click databases
MySQL, PostgreSQL, Redis and more, each in its own container with fixed RAM, daily backups and restore. Attach one to an app and the connection variables are added for you.
Create the database
Open Databases › Create database. Choose the type, give it a name and pick a plan. The first month is deducted from your wallet.
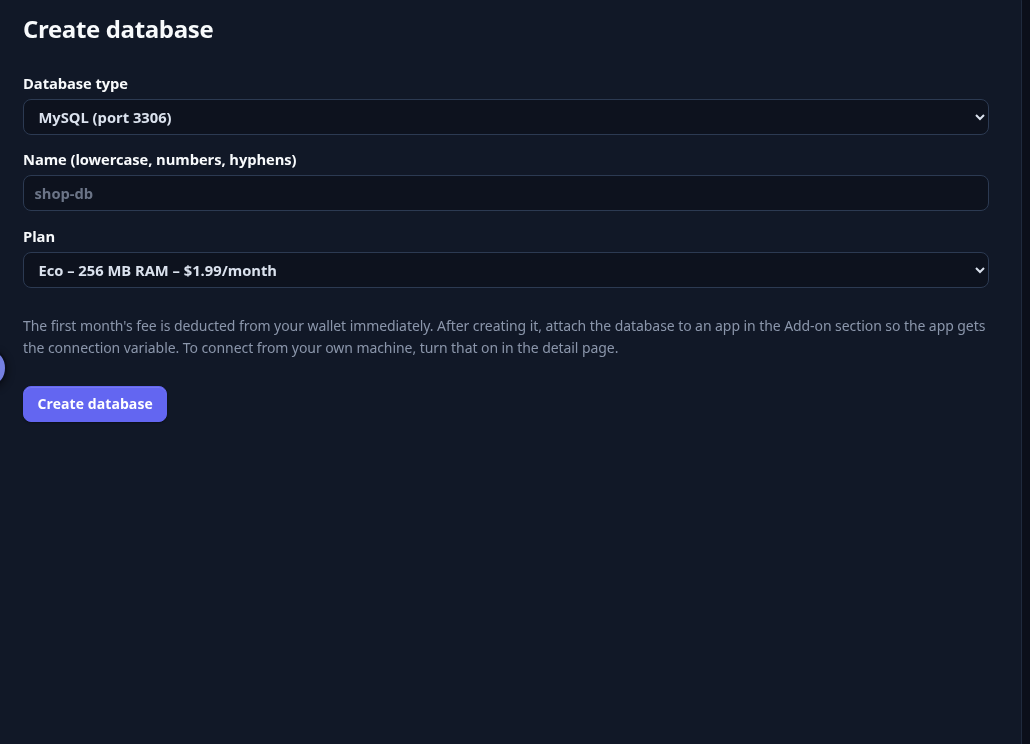
Create database form: type, name and plan Attach it to your app
Open your app, tab Add-ons, choose the database and attach. The variable (for example
DATABASE_URL) appears in Settings › Environment variables and the app restarts.Connect from your own machine
Open the database page and turn on external access, then use the host, port and password shown there with any client (DBeaver, psql, mysql…).
Back up and restore
Backups run daily. On the database page you can download a backup, restore it, or test-restore into a new database first.
Just need a small database? Use the free one
The Free database page gives you MySQL, PostgreSQL or MongoDB (100 MB, TLS, up to 3 per account) with your own user and password, plus a query console in the browser.
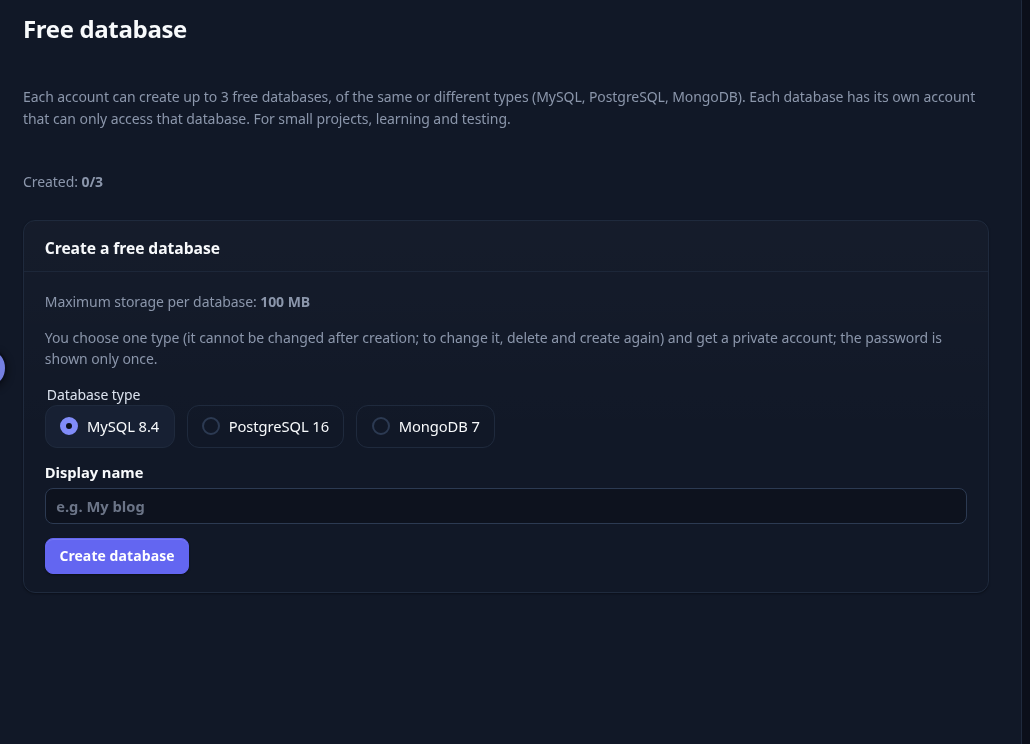
Tip: Databases live on the private network of your project, so your app reaches them without exposing a public port.
3HTTPS
Every app address gets a free SSL certificate automatically. For your own domain, HTTPS is requested as soon as its DNS points to the platform and renews itself.
Use the default address
After the first deploy the address
your-app.examplealready works over HTTPS. Nothing to configure.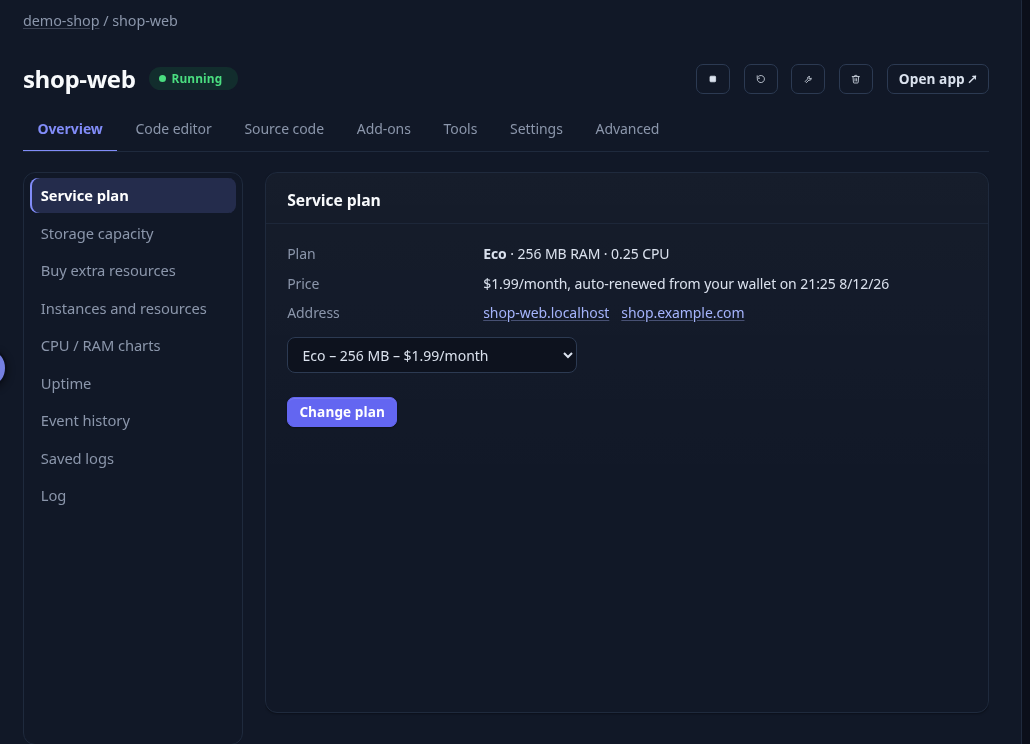
App address shown in the overview Add your domain
Follow the Custom domains section below. When the DNS record is correct, the certificate is requested automatically and the status turns green.
Force HTTPS
In Settings › App nginx security tick Force HTTPS to redirect all http traffic to https (only once the app is reachable over HTTPS).
Using Cloudflare or a CDN?
If the certificate is handled outside the platform you do not need to enable anything here.
Tip: Certificates renew on their own and you are notified if a renewal fails.
4RAM/CPU as you need
Start from a small plan (from 100 MB) and add RAM or CPU in small steps only when your app needs it. Change plan any time.
See the current plan
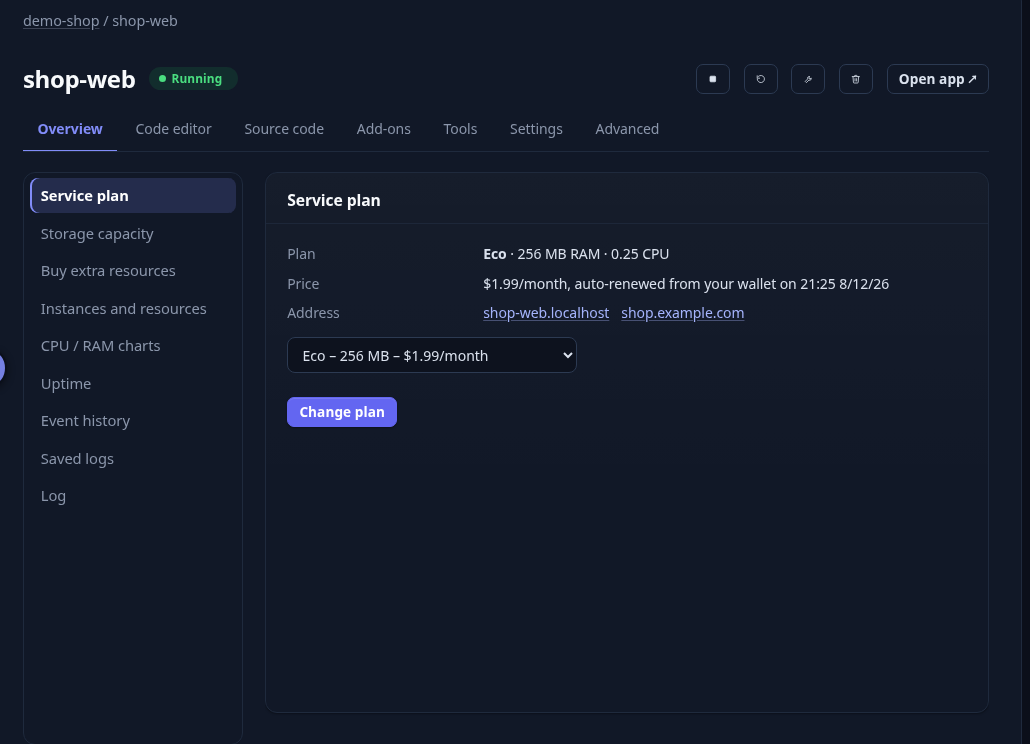
The app Overview › Service plan shows RAM, CPU, price and when it renews from your wallet.
Service plan panel Change the plan
Pick another plan in the list and press Change plan. The new plan applies right away.
Add extra RAM or CPU
Open Buy extra resources, choose how many steps of RAM or CPU you want and confirm. Remove them later when the load drops.
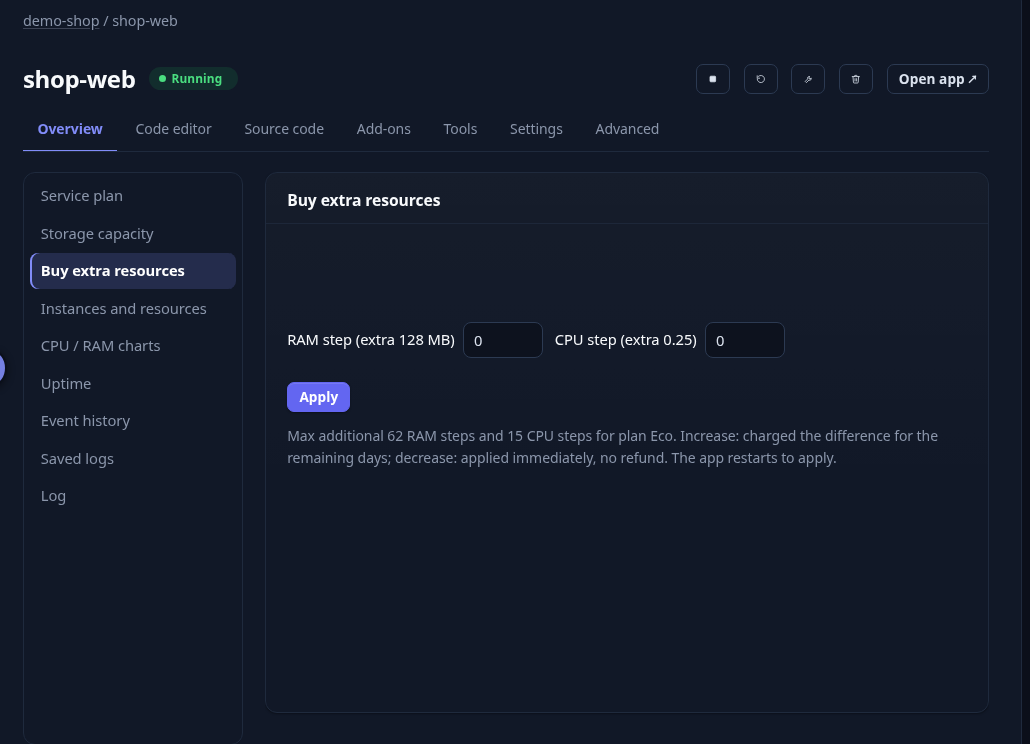
Buy extra resources panel Scale instances
In Instances and resources run more than one instance of your app when the plan allows it.
Tip: Out-of-memory builds are the most common reason for a failed deploy. Add RAM, or set a smaller Node heap in Environment variables.
5Edit code in the browser
A VS Code-like editor in your browser: edit files, commit and press Deploy. Nothing to install.
Open the editor
In your app choose the tab Code editor. The files of your deploy branch are listed on the left.
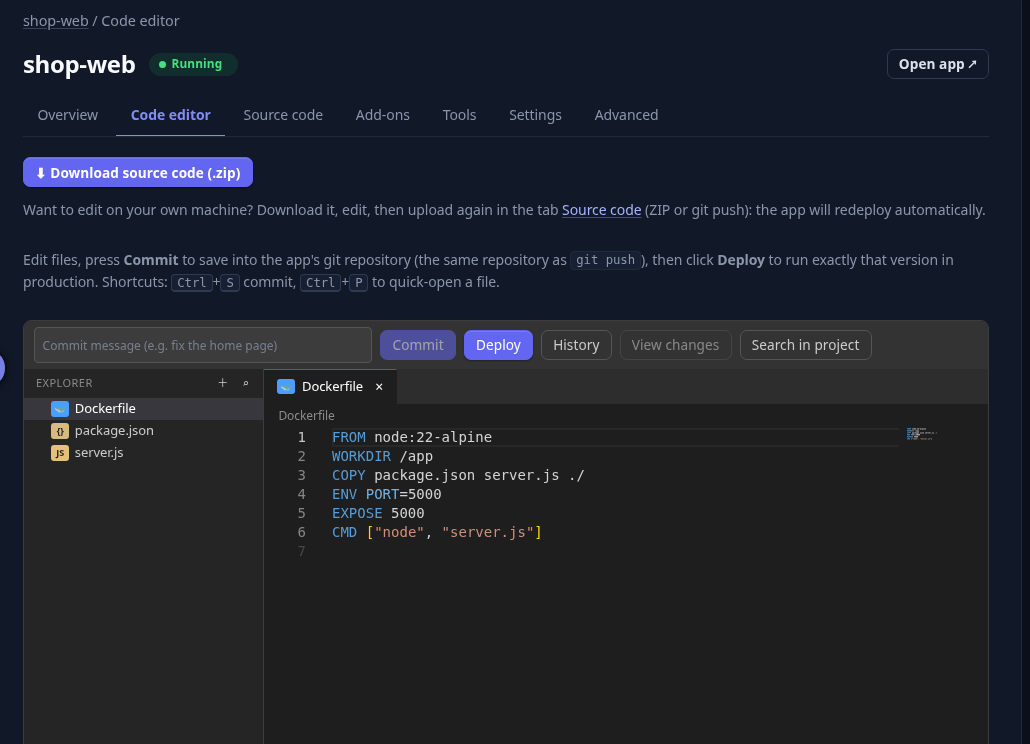
Browser code editor Edit and save
Click a file to edit it. Use the search to find text across the project, and the diff view to review changes.
Commit and deploy
Write a commit message, commit, then press Deploy. The build log opens and your change goes live.
Tip: Great for a quick fix from any computer, or from your phone when you are away from your laptop.
6Monitoring and alerts
CPU and RAM charts, uptime, request latency and 5xx rate. Get an email or webhook when your app goes down.
Watch CPU and RAM
Open Overview › CPU / RAM charts for the usage over time.
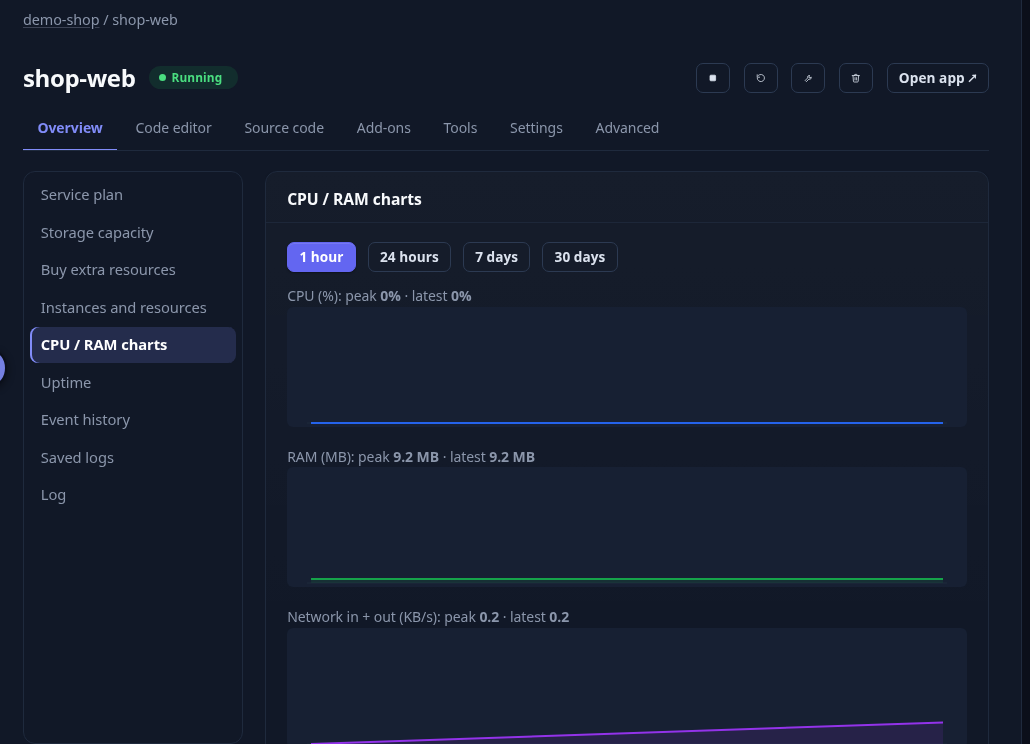
CPU and RAM charts Check uptime and events
Open Overview › Uptime to see when the app was up, and Event history for restarts and crashes. Tools › Request latency (24 hours) shows how fast your app answers.
Get alerted
Alerts about downtime, failed deploys and renewals arrive in Notifications and by email. Add a Slack, Discord or webhook URL in Account to send them to your own tools.
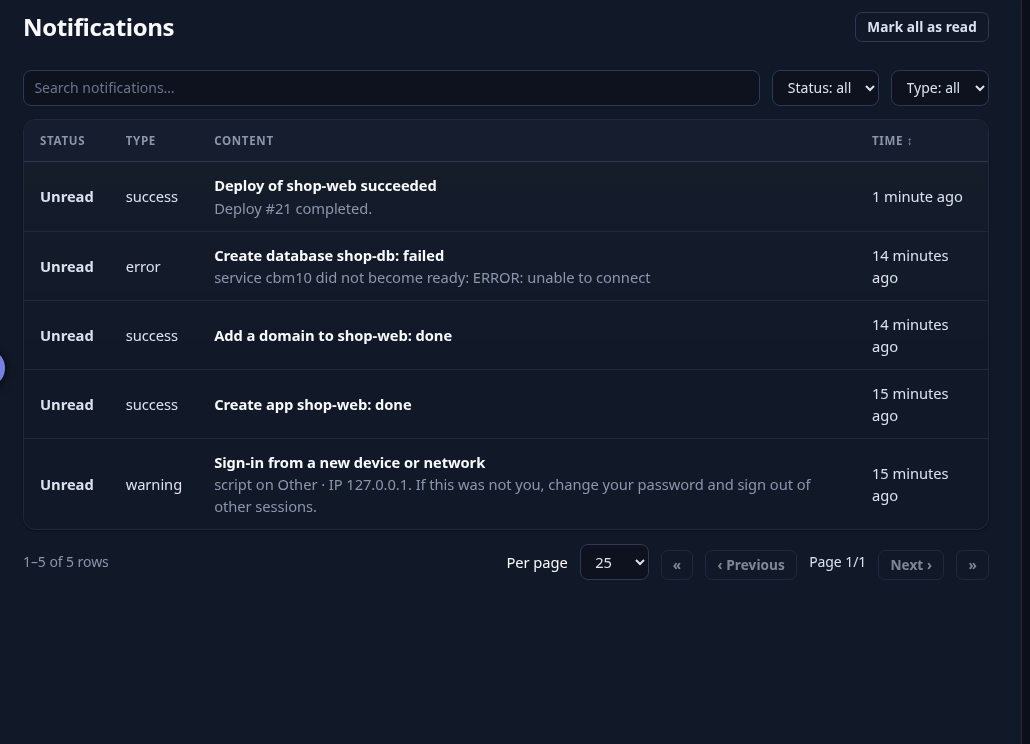
Notifications page Read the logs
Overview › Log shows live logs; Saved logs keeps history you can search.
Tip: A public status page can be switched on in Settings if you want customers to see uptime.
7Environment variables
Configuration per app, kept out of your code. When you save, the app restarts automatically so the new values take effect.
Open the list
Go to Settings › Environment variables. Click a value to copy it.
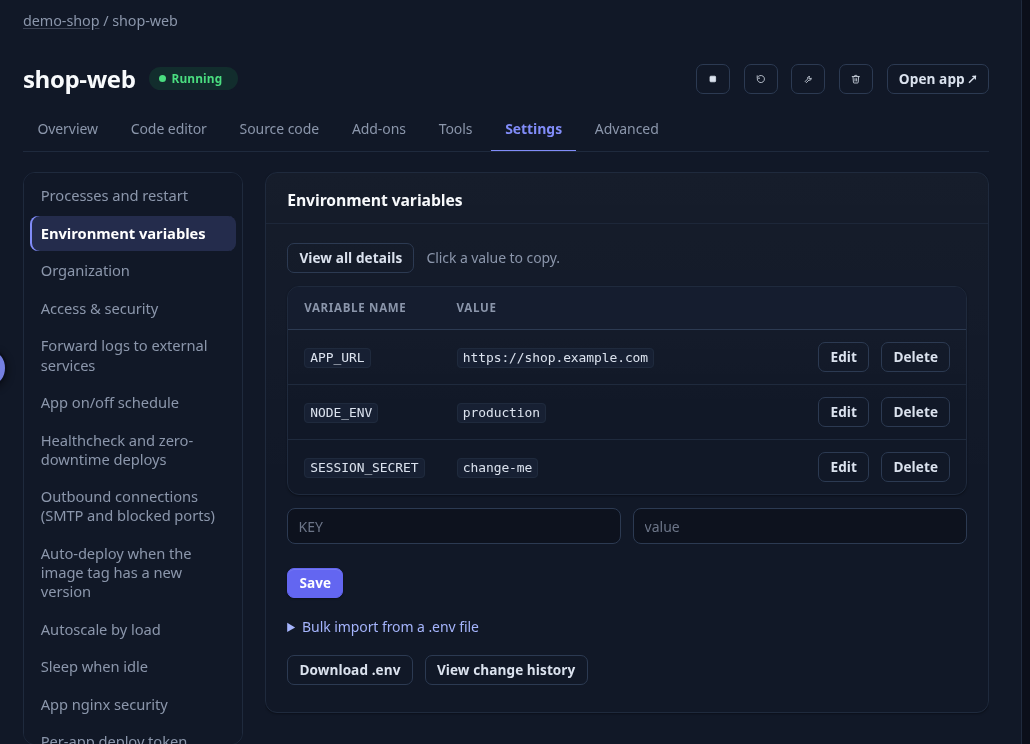
Environment variables list Add or change a variable
Type the key and the value, press Save. Use Edit and Delete on a row to change it later.
Import a .env file
Open Bulk import from a .env file, paste the content and save. Download .env exports the current values.
Share across apps
Use Variable groups in the left menu to define a set once and attach it to several apps.
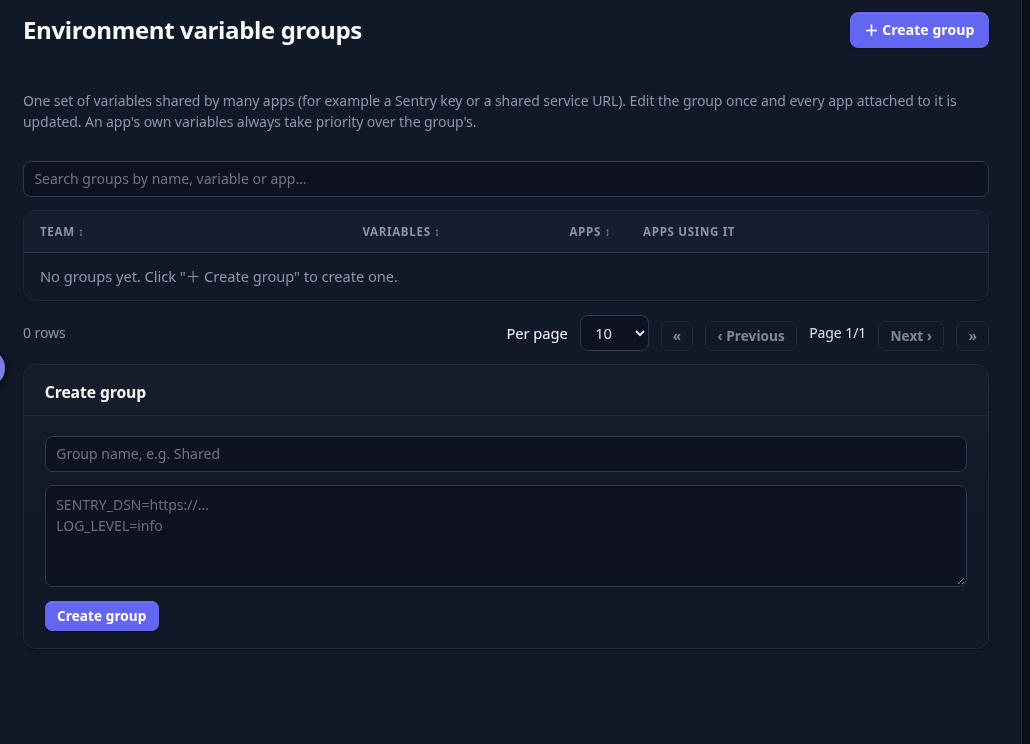
Variable groups page See who changed what
View change history lists every change with its date and author.
Tip: Never commit secrets to git. Put them here instead; values are hidden from people who only have view access.
8Cron and one-off commands
Run migrations or scheduled jobs from the web, with run history.
Run a command once
In the tab Add-ons choose Run a one-off command, type for example
node scripts/migrate.jsand run it. The output is shown live.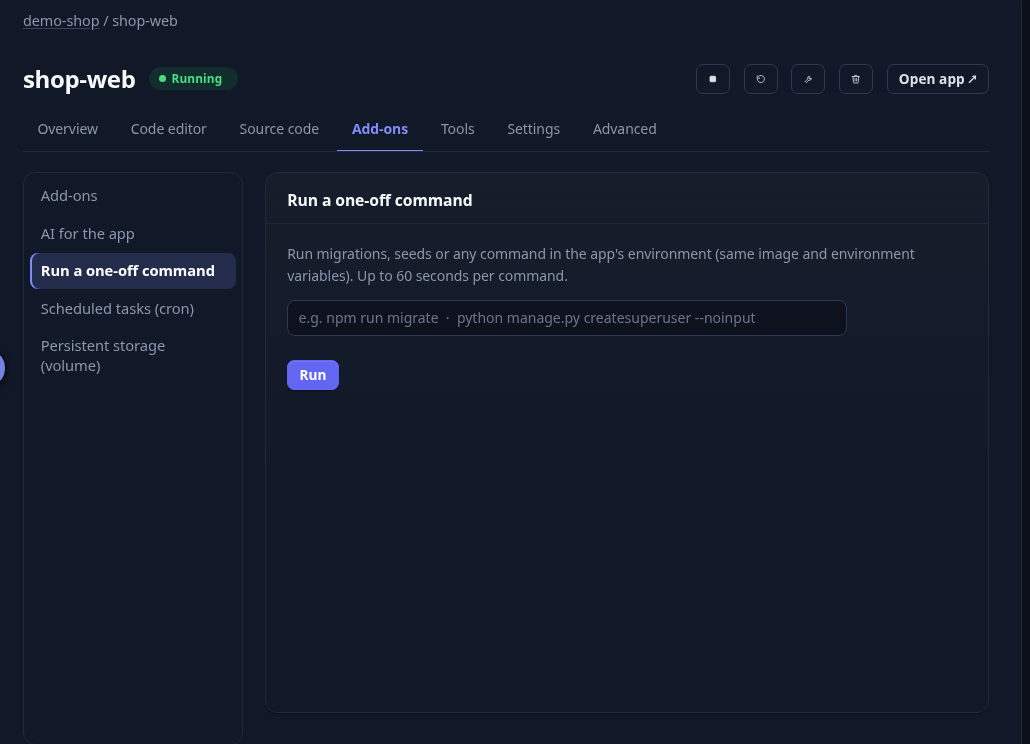
Run a one-off command panel Schedule a job
Choose Scheduled tasks (cron). Enter the schedule as
minute hour day month weekday(Vietnam time) and the command, then press Add.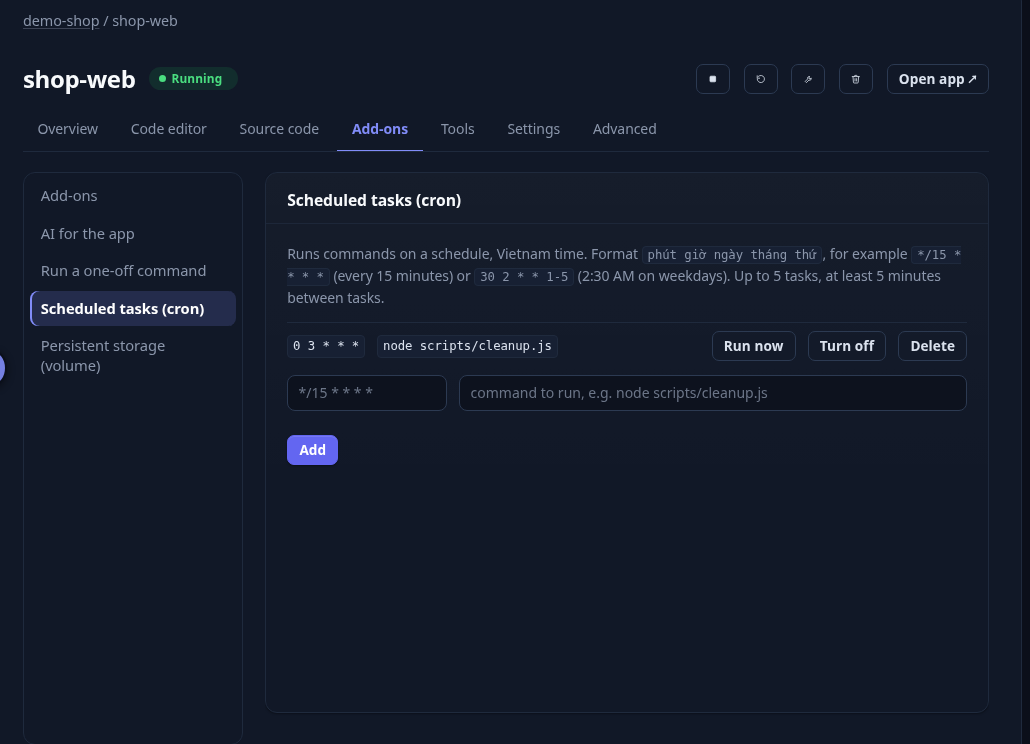
Scheduled tasks panel with one task Understand the schedule
*/15 * * * *runs every 15 minutes;30 2 * * 1-5runs at 2:30 on weekdays. Up to 5 tasks per app, at least 5 minutes apart.Test and manage
Run now triggers a task immediately, Turn off pauses it and Delete removes it. Each run is kept in the history.
Tip: Tasks run in a copy of your app’s container with the same environment variables.
9Built-in AI assistant
Ask about build errors, domains or databases and get step-by-step help, based on your own app’s deploy log. It only advises and never changes anything.
Open the assistant
Press AI assistant at the bottom right of any dashboard page. You get free tokens every day.
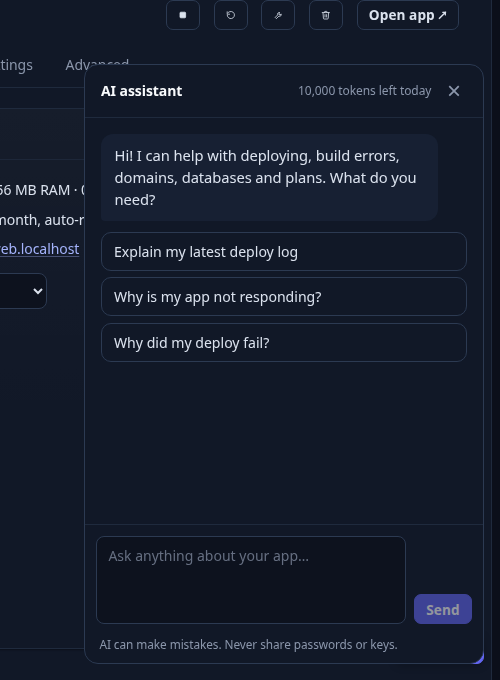
AI assistant chat window Ask, or pick a suggestion
Try Why did my deploy fail? The assistant reads your latest deploy log and explains the cause and the fix.
Ask in your language
It answers in English, Tiếng Việt or 日本語, 24/7.
Need more?
Buy extra tokens in AI Gateway, or use the AI for the app add-on to call models from your own code.
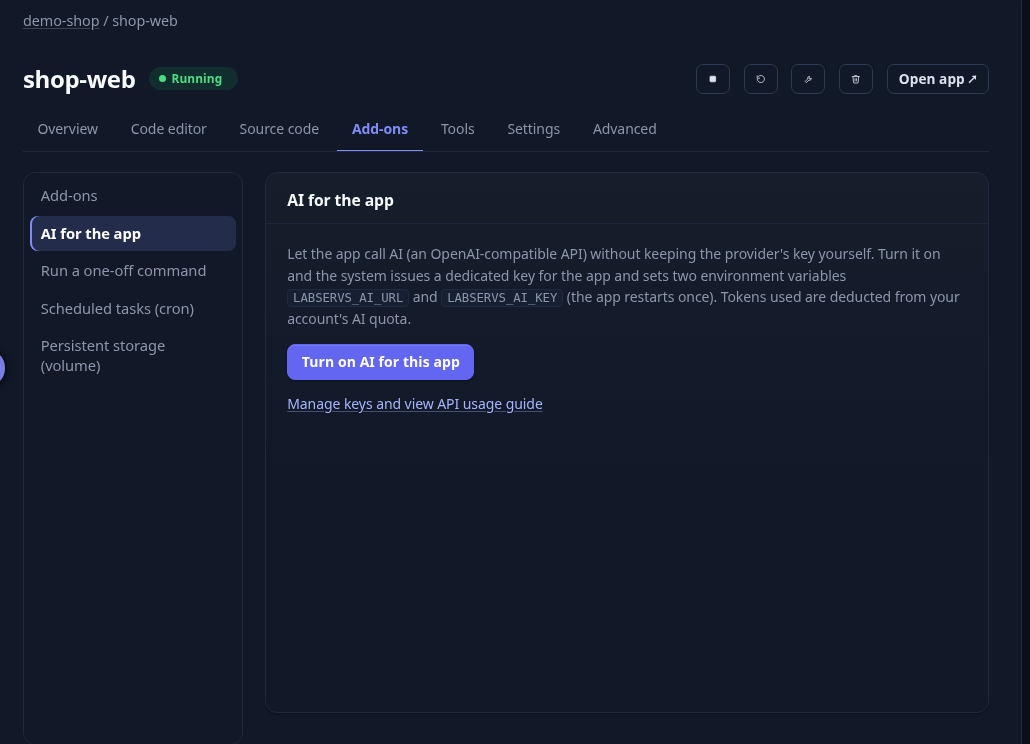
AI for the app panel
Tip: Never share passwords or keys in the chat.
10Custom domains
Attach several domains to one app, with DNS checks and the records to create.
Add the domain
Open Settings › Domain, type
app.example.comand press Add.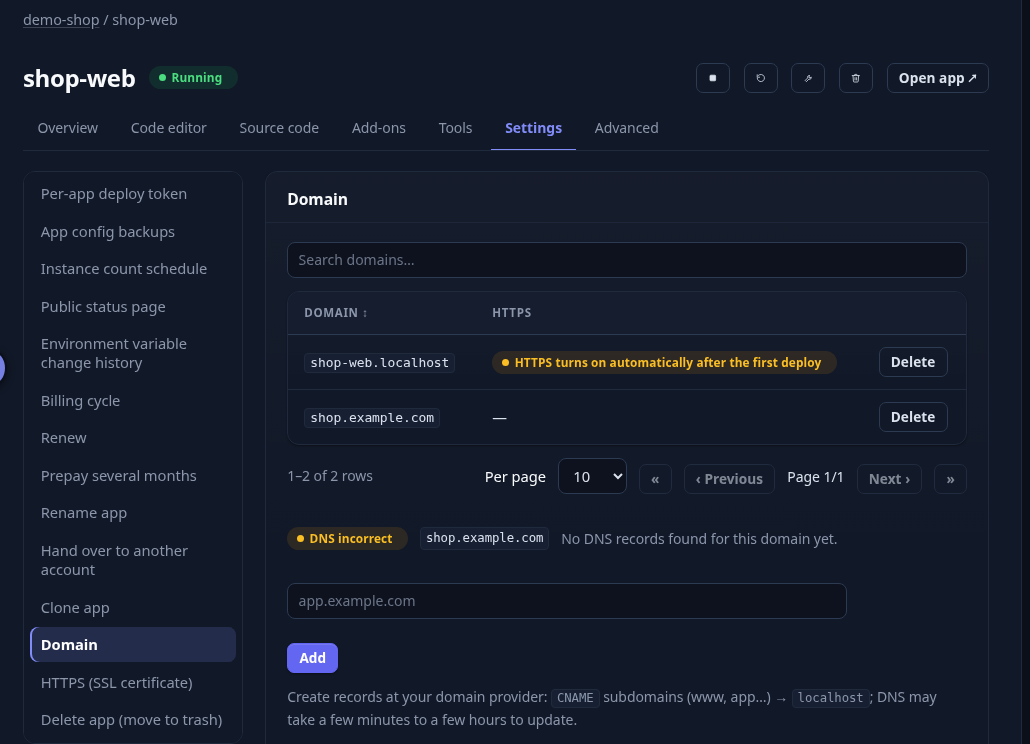
Domain panel with the list of domains and the DNS check Create the DNS record
At your domain provider create a CNAME record for the subdomain pointing to the address shown (for a root domain use the A record shown). DNS can take a few minutes to a few hours.
Wait for the check
The status changes from DNS incorrect to correct by itself; HTTPS is then requested automatically.
Add more or remove
Add as many domains as your plan allows. Delete removes one.
Tip: Using Cloudflare? Keep the record on “DNS only” until the certificate is issued.